
How to Clean and Maintain Your Microwave
- June 18, 2025
- 0
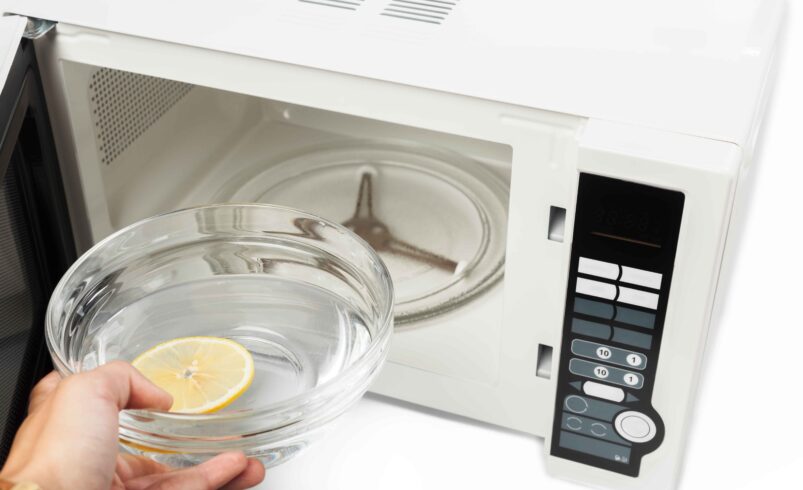
Let’s Face It: Your Microwave Is the MVP of the Kitchen Your microwave is certainly the most used device that you own.It’s always there for reheating, defrosting frozen
Max Mustermann Musterstraße 12 12345 Musterstadt Germany (Deutschland)
Let’s Face It: Your Microwave Is the MVP of the Kitchen Your microwave is certainly the most used device that you own.It’s always there for reheating, defrosting frozen